It wasn’t the perfect kind of day or lighting to do a photo shoot but I just could not contain myself any longer and had to share my newest creation:
The Queen’s Bench

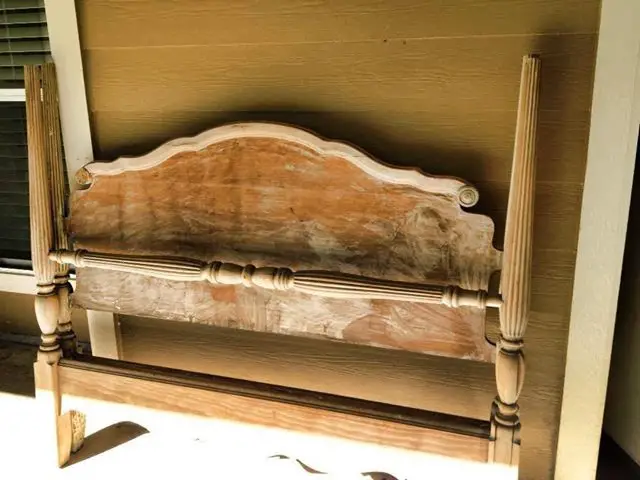
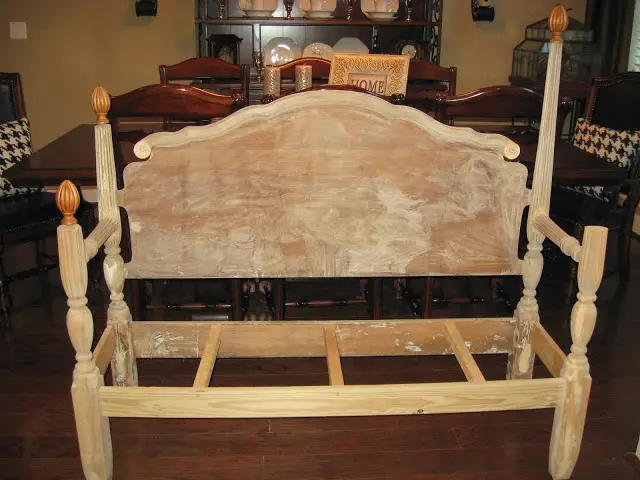
Remember how she started out as a headboard and footboard?
This is how she looked when I found her, except she was tucked away in the back of a junk store. Silly me actually P A I D for it like this but I had plans and was determined to make it pretty!
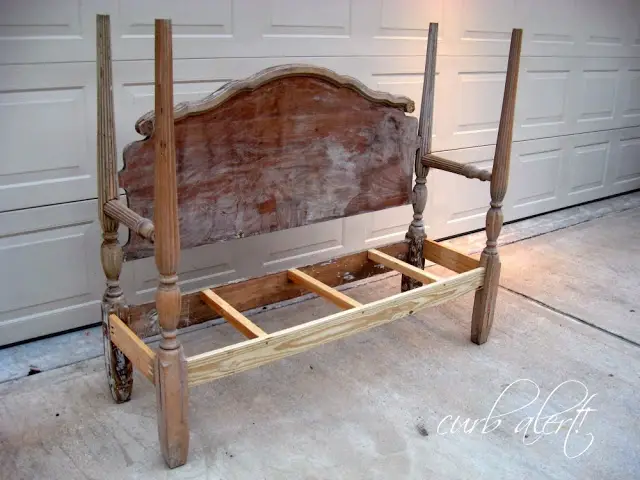
I cut a few pieces here and there and reconfigured some others.
I tried to use the entire footboard but it was a thin splitting veneer that just did not work as planned.
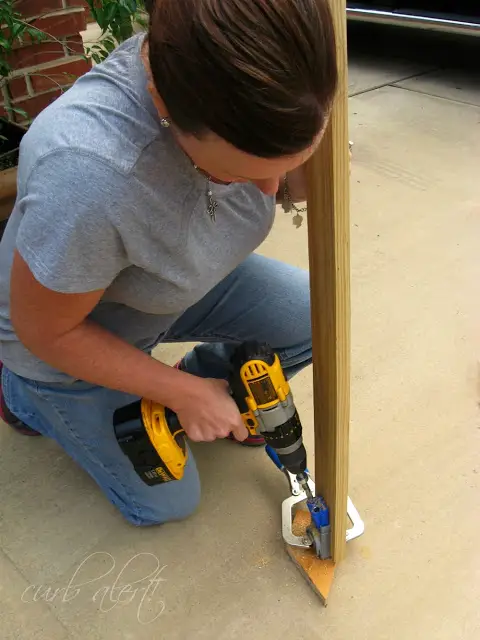
I read up on a few tutorials from the Headboard Bench Queen Herself, Gail of My Repurposed Life and with lots of screws, wood filler, much cursing and crying trial and error I made it work. I was determined to use the wood we had on hand so in hindsight I would probably purchase new wood. It didn’t bother me as much this time because I was making this bench for me…The Queen! Yes, I joke in my family saying that I am the Queen. It may be only the Queen of the Eight Crazy Kiddo Bunch but hey it makes me feel good so let’s just stick with it, mkay?
Oh and I won’t even begin to TRY to give you a tutorial of how I did it because Gail already has some fabulous tutorials on her blog! She’s to girl to go to if you need some advice because she had made quite a few. (Thanks Gail!)
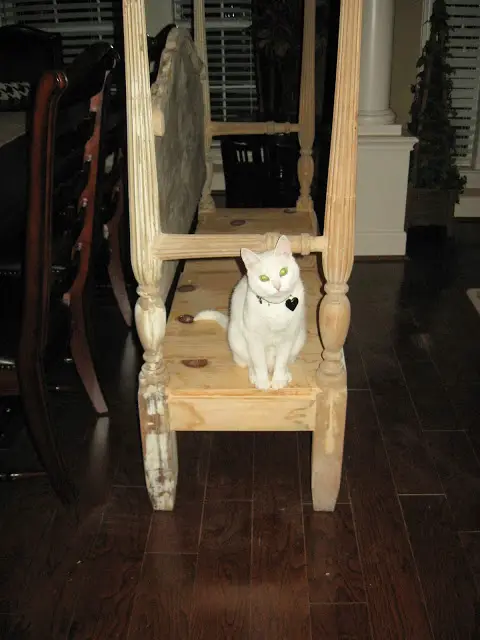
Even one of my little fur friends gave me the thumbs up during inspection.
I’ll be honest, there were a few times that I wanted to scrap the project all together, like when I cut off the spindles and then HATED it. I also went all over town looking for just the right finials. The problem was that I couldn’t tell if they would work unless I saw them ON the piece.
The finials below were set #3, I returned all of the others (these included)!
I attempted to glue the spindles back on and so glad I did. I like the way it keeps some of the original character of the bed and makes it a little more elegant. Finials #4 were keepers…much better now…freak out mode now over!
I was getting very excited as my vision was successfully coming together. I started to post about it on my Curb Alert! Facebook Page and was so excited about all of the positive feedback and encouragement!
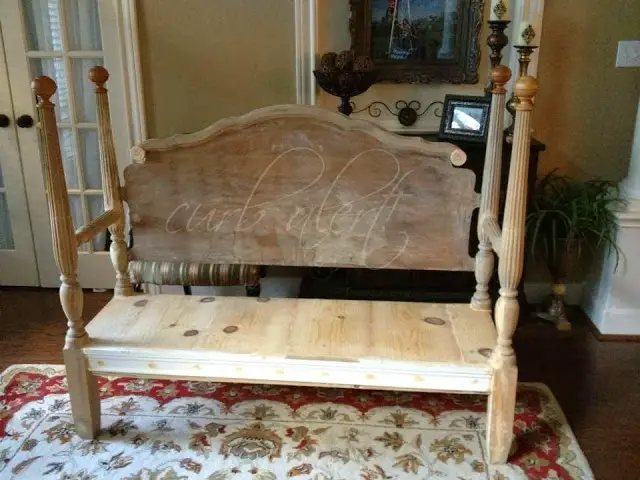
I tacked on some molding on the seat and was ready to Paint, my favorite part!
I was itching to paint it a fun color but since it NEEDED to fit in with my current decor I decided to go with my go-to color black! I loved it with just the base coat but felt I needed to kick it up a notch.

Did I mention IN LOVE?!?
I just had to fool with it some more.
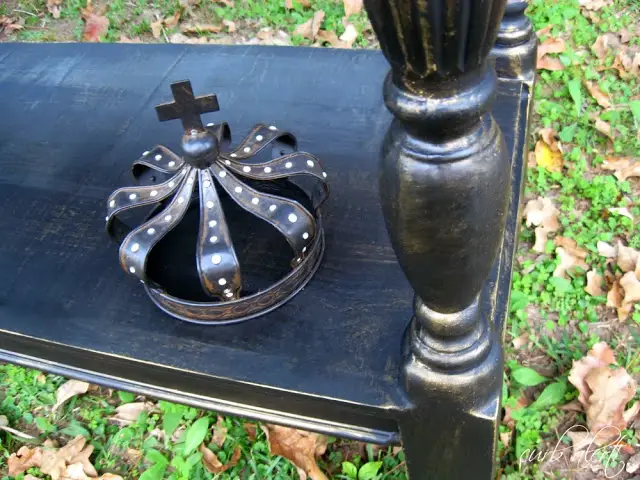
Inspiration hit again when I saw this at Hobby Lobby and thought gold would be the perfect touch to make her look even more royal!
So out came the gold paint and the distressing began…a little too much at first, then I toned it down a notch. I think it’s just enough now.
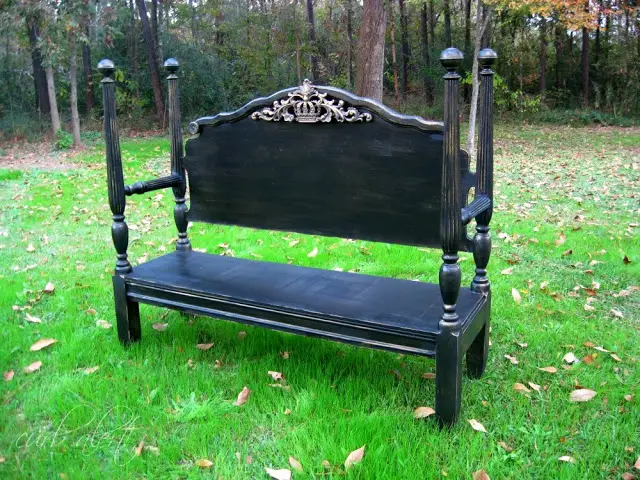

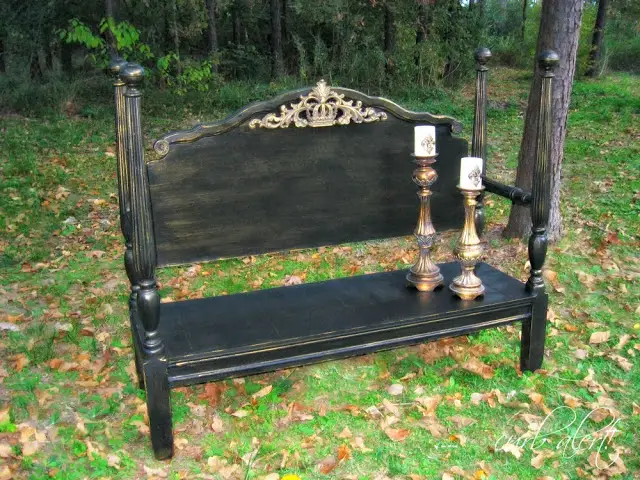
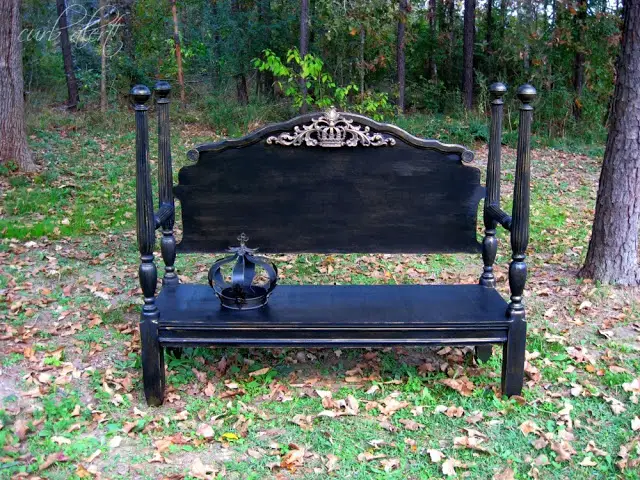
Aaaand there’s my crown! I love crowns, maybe one day I will share with you my collection!

That Headboard Bench so much fun to make, I think I will have to make a few more (in fun colors!)
What do you think of The Queen’s Bench?
I would love to hear your thoughts!
Update: A few days later I decided to REPAINT the Bench. To see the updated post click HERE!
Happy Treasure Hunting!

Sharing this post at:
I absolutely love it!!!!
Oh my gosh I LOVE it!! BEAUTIFUL!
Tami- I think that is just spectacular! You did a wonderful job and I love the layering of gold and the filigree piece in the middle ads the (dare I say it?) crowning touch. Beautiful!!!! xo Diana
Tami girl . I loved this so much I texted you at 6 something LOL . I then posted it on my face book bragging about my friends latest creation. GIRL talk about the definition of fabulous and how sweet of you to make that for me for christmas. YOU knew this queen would love it LOL my father is KING you know… All kidding aside . I am now on to finding me something to make this OMGOODNESS BEYOND LOVE LOVE LOVE did I say LOVE enough … xoxoxo hugs and love you bunches…
I have to say, just because you asked on FB, that I like it in plain black. But that is because it would match my home better, It looks good with the gold too and since you are keeping it for yourself go with what you like in your home. You can always paint it again later.
Traci
You did a great job building this bench! Thanks for the shout out, I appreciate it. 🙂
way to go girl!!!
gail
ps the next one might be easier, but because each bed is different, no two are ever the same. 🙂