Great inspiration in store for you today as I share with you the
Rock Your Knockoff Pinterest Bedroom Makeover!
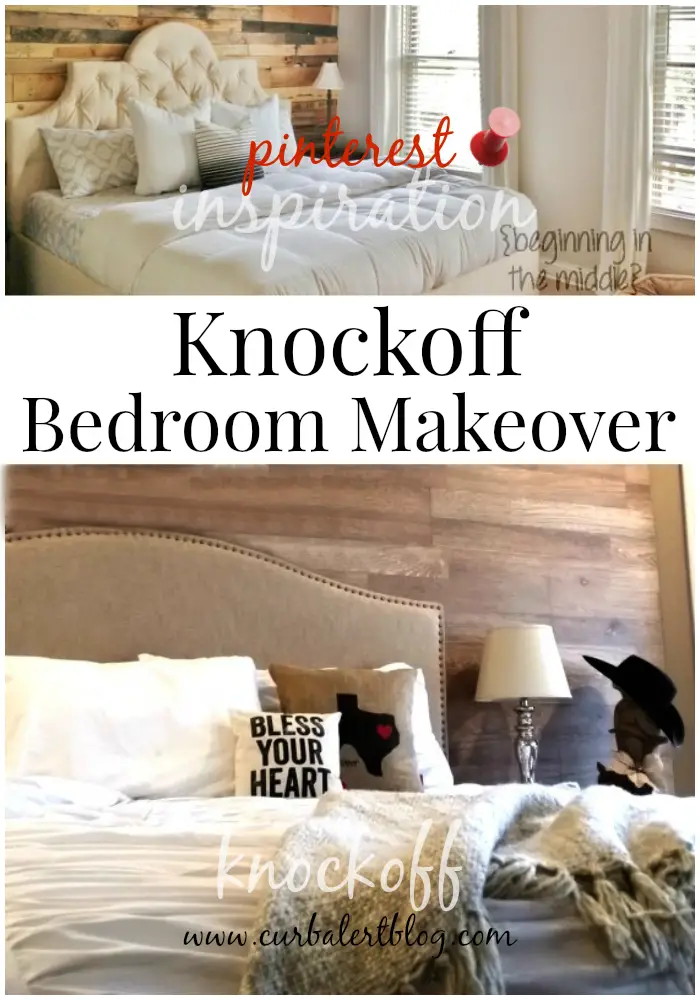
This bedroom has been in the works for over six months now.
I have been drooling over
some plank walls for quite some time and have many, many ideas pinned on my Pinterest Board.
I decided that this is the look that I wanted for our Master Bedroom:
Planked walls, upholstered headboard, creams and whites.
I kept going back to this image as inspiration:
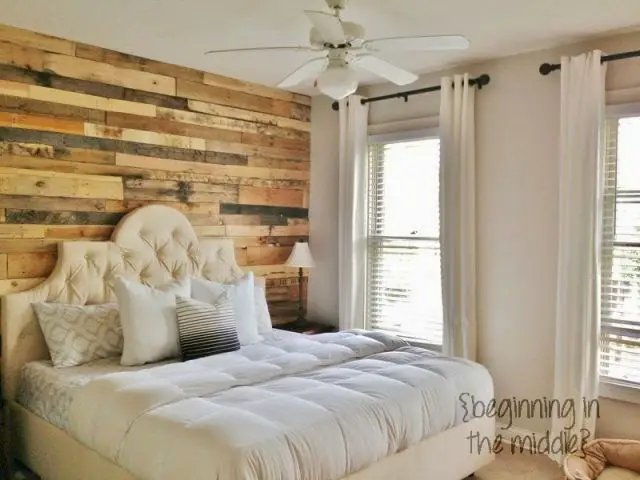
I give major props to these homeowners as they installed their pallet wall on their own and made their tufted headboard. I bet they saved a ton of money and did such a great job doing so!
Here is what our room looked like before:
Tan walls, no headboard and dark room, dark comforter – similar one here. I enjoyed having a dark, cozy room for a very long time but am now ready for a lighter fresh more romantic start!

The hard part was convincing my other half. It took quite a while to convince him to like a wood planked wall without looking at me like I am crazy! He finally agreed but a stumbling block is his allergies. We were worried that sleeping near used wood would be a problem for him.
We found our solution at the hardware store and both agreed on the look of rustic whitewashed tongue and groove flooring. It was a great option but if your are tempted to try it but you nervous then check out this Peel and Stick Vinyl Flooring. I think I would have gone in that direction if I would have thought of it.
We started at the bottom of the wall and marked out where all of the studs were and then worked our way up the wall from left to right.
See the tape marks down there? That’s how we marked the studs.
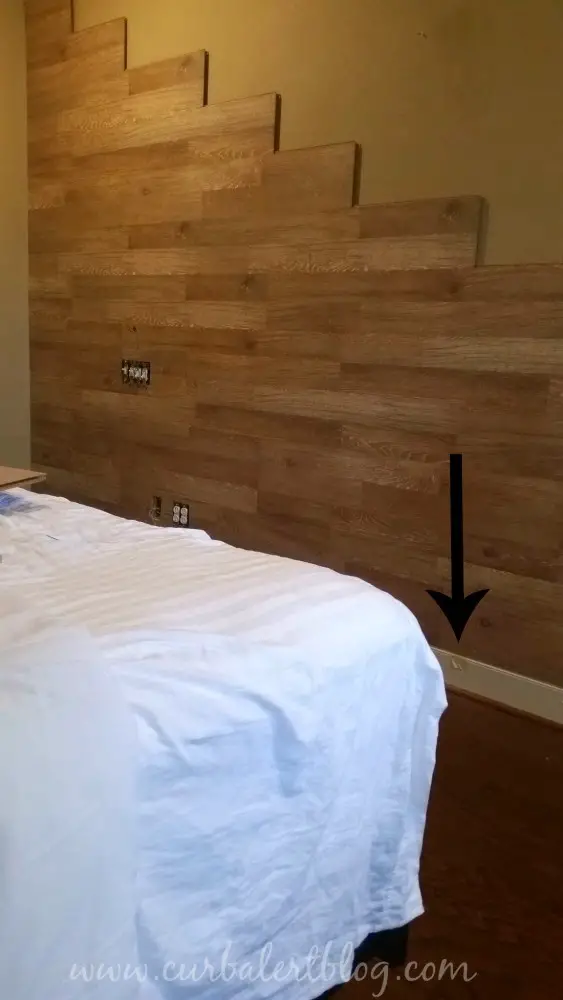
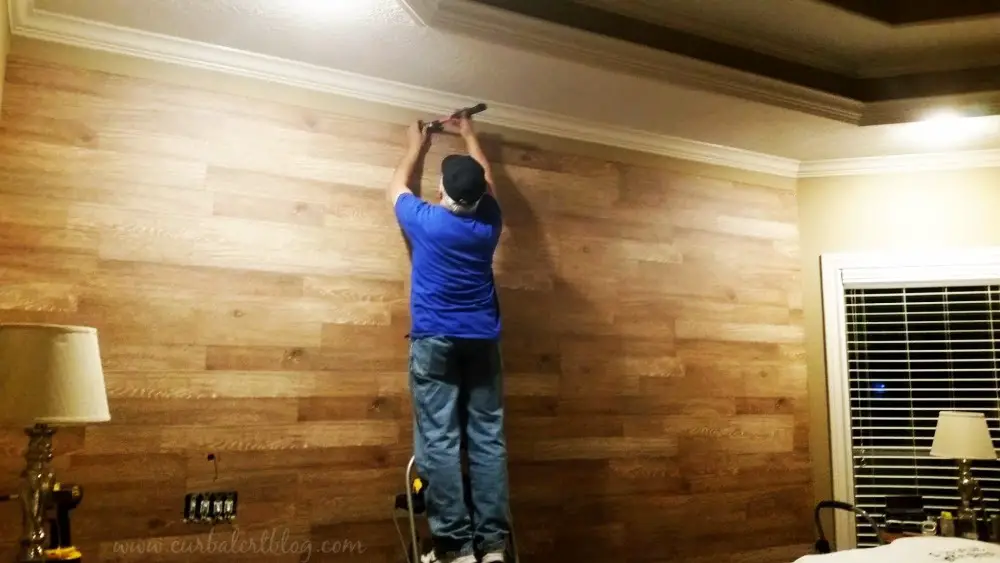
I have to mention that my husband did an Excellent job on measuring around the outlets and plugs.
The wall was already fitting together super tight by the tongue and groove, but we added nails along the studs just to be safe.
Would you believe that it only took us five hours to complete? We started out in the morning and by the evening we went to bed in a whole new bedroom.
Remember the pictures of my DIY Coffee Filter Angel Wings and my DIY Knockoff Card Catalog?
They were pictured in front of this wall as a hint of this makeover.
I love how it also serves as an interesting backdrop for my blog photos, although it’s not the easiest light to photograph in.

I am very pleased with it! I am shocked that hubby is on board with all of these projects so far, I am so proud of him for just going with the flow of my ideas and he knows what’s best for him (happy wife, happy life!)

He did put his foot down with having the angel wings on our wall with a big “he!! no” so they now reside in our six year old’s room. They look better in there anyway and she is super excited that I gave them to her!
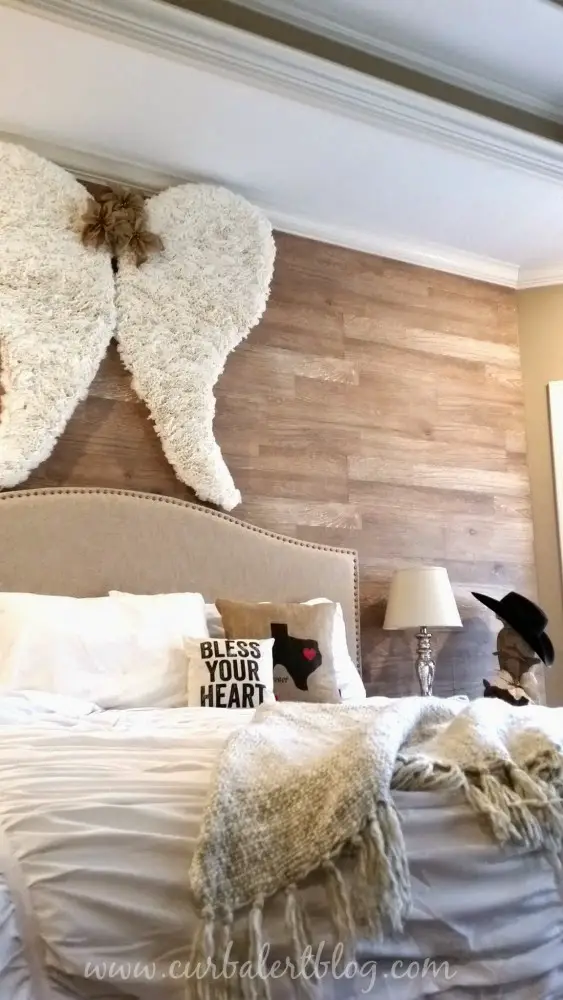
I have been studying tufted headboard tutorials and know I can do it for a fraction of what I spent on my new headboard, but when I saw this one online I just had to buy it. It’s made of linen fabric, very elegant with nailhead trim. It was a great price and what the heck, it was Christmas and my Birthday so I deserved it, right?
I also found a tufted headboard like this Pinterest Inspiration picture here, in case you are interested.
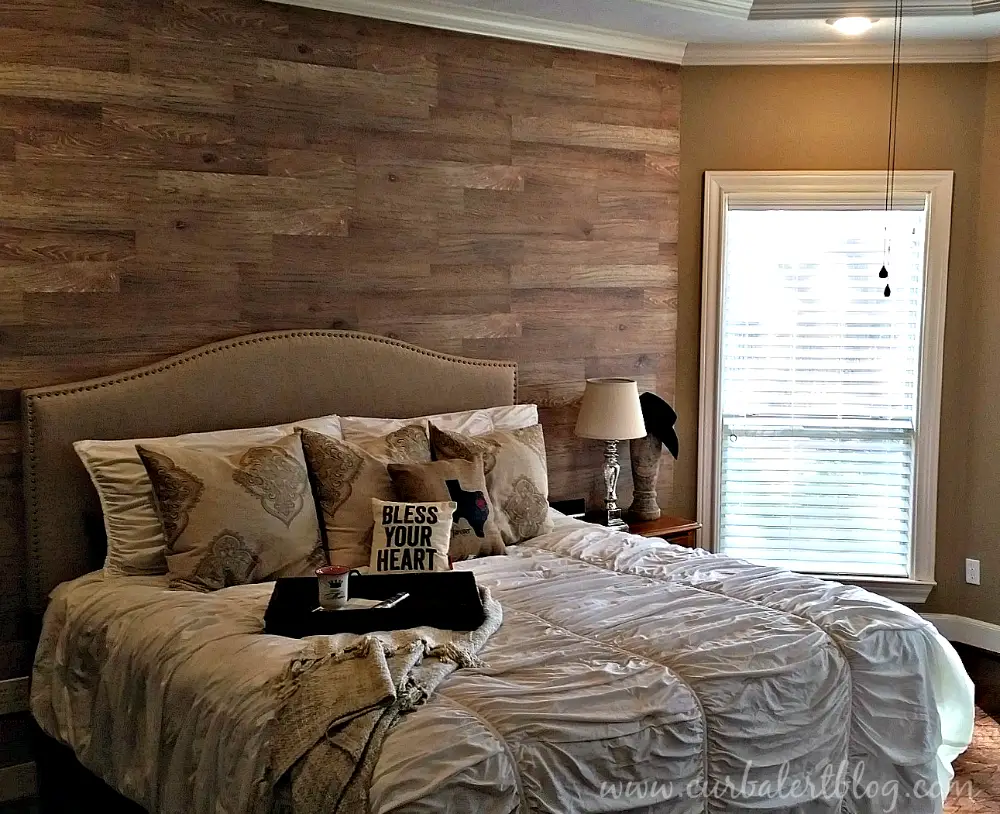
I purchased the white ruched king size comforter online and the Texas and Bless your Heart pillows are from a local boutique. You can find similar pillows here. My husband is not too sure about the messiness of the ruching and pleats on the comforter and as I am kind of a control freak, I am shocked that I actually really like it. Since it’s always a bit messy I am not so fussy about trying to keep it all straight and neat!
Large pillows: Target
Throw blanket: Target
Mercury Glass Lamp: Walmart
I never thought we could live with a white fabric on anything in our home but finally decided to go for it. Our little girl, Diamond likes it too as she never wants to leave from her spot!
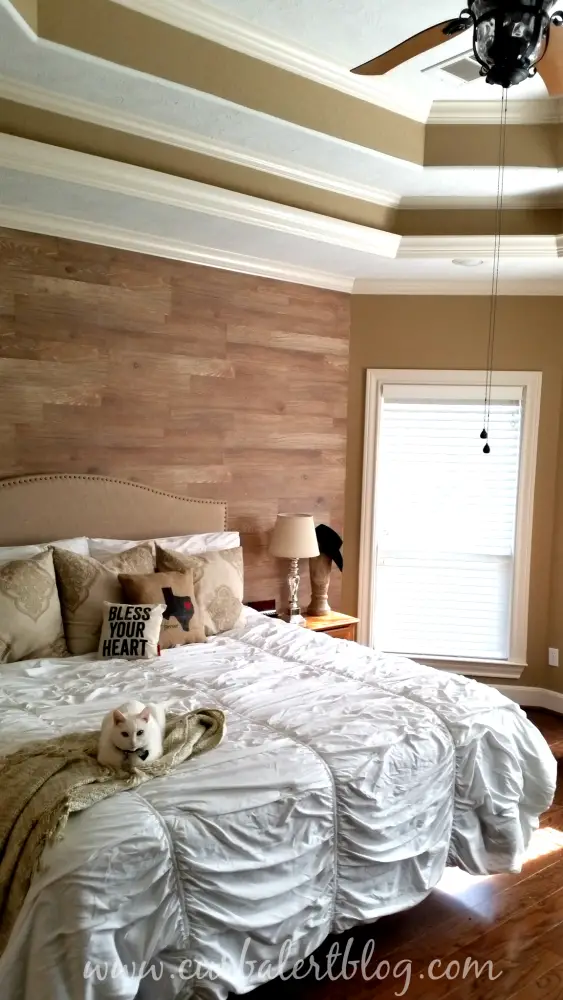
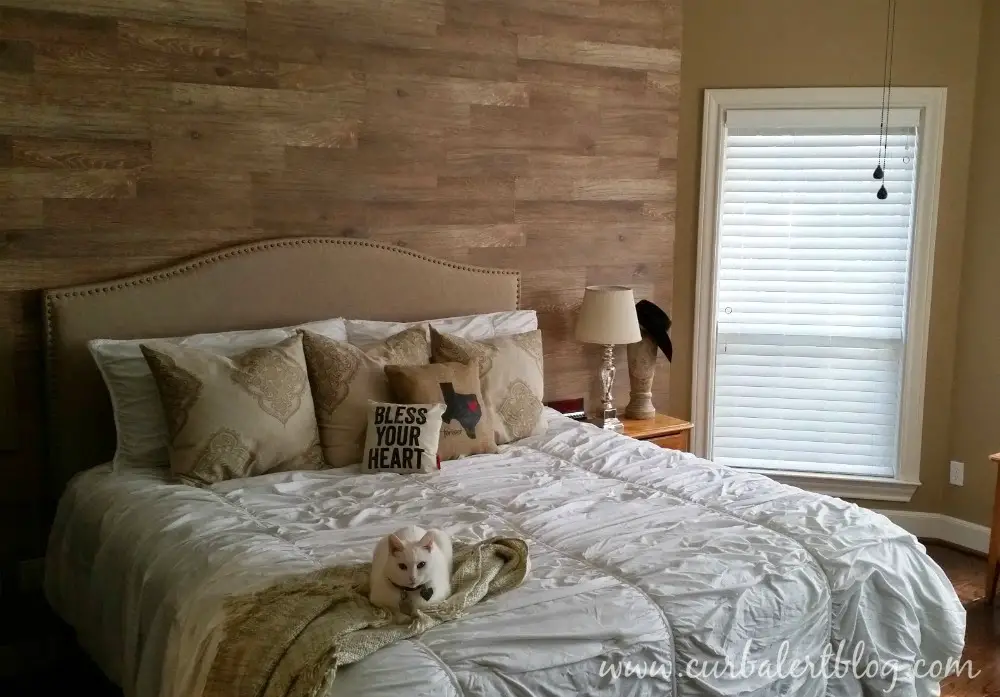
I am so pleased with how our room turned out and so glad we decided to build our wood planked wall. It was super easy and cost us less than $200.
A bit rustic looking but still very clean and durable! I think we will enjoy it for a very long time!
Oh, and one more picture, just because I think it looks cool!
P.S. I cannot believe I just showed the world my bedroom! oh well!
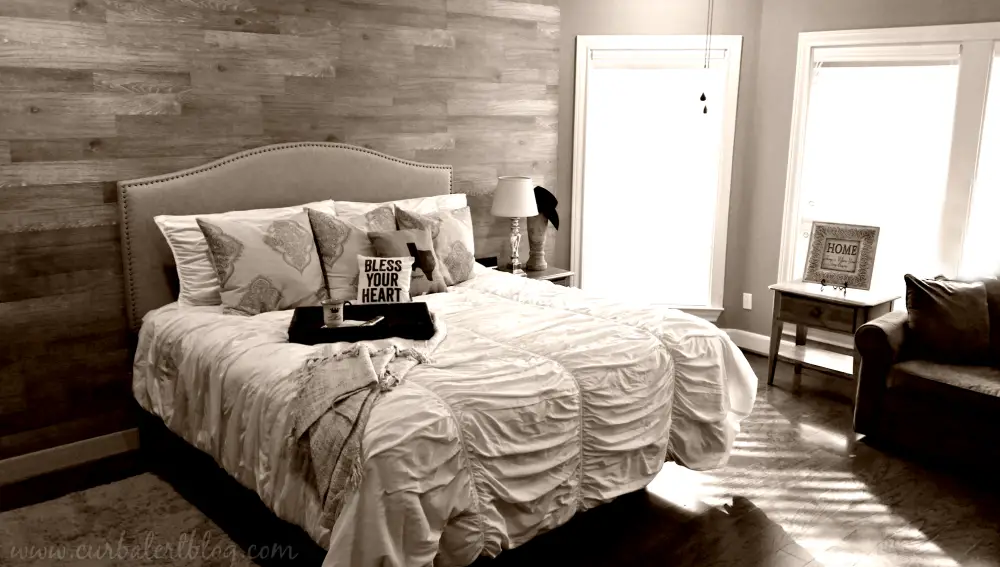
Well I hope you like it too, tell me what you think. I would love to hear your thoughts.
Oh, now off to try to convince MyLove that we need a chandelier in there!

Please note that affiliate links are added for your convenience.

Be sure to stick around and see how my other blogger friends have been inspired by Pinterest!

It looks great! I love the wall and the wings.
This is gorgeous what a transformation, you did an amazing job!
Amazing! I know you are so happy with the end result of this project. The wall and your new headboard both look terrific.
I love the warmth and texture the wood adds to the room. So cozy. Thanks for always being inspiring!
Looks terrific! I wasn't able to pull up where you found the headboard at a reasonable price. Would you please let me know, it's just what I've been looking for!
Your new wall makes the room look so warm now and that headboard is gorgeous…great find!
Wow, you have some mad DIY skills, girl. This room and the comforter look absolutely stunning! well done! Sharing everywhere today, my readers will love this!
I love the vinyl flooring tiles in place of pallet wood. The cohesive coloring looks great! That comforter is so beautiful and fits the bill for romantic!
It looks fab Tami! I would not suggest peel and stick. If you do regular planking and get tired of it you can easily just pop it off the wall. Peel & Stick you will have a giant nightmare trying to get it off . I would think it would leave a terrible sticky mess on the wall and would require either sanding or new sheet rock. Yours looks amazing!
Tami, I absolutely love your bedroom. I've been wanting to plank the back wall in our little water closet room. Now you've inspired me to go for it. The headboard is perfect and I love the lightness of the room. Jeanette
WoW!! Awesome job and what a huge undertaking! Love your solution too. You did a fabulous job of recreating the look..only making it better! Pinning & Sharing:)